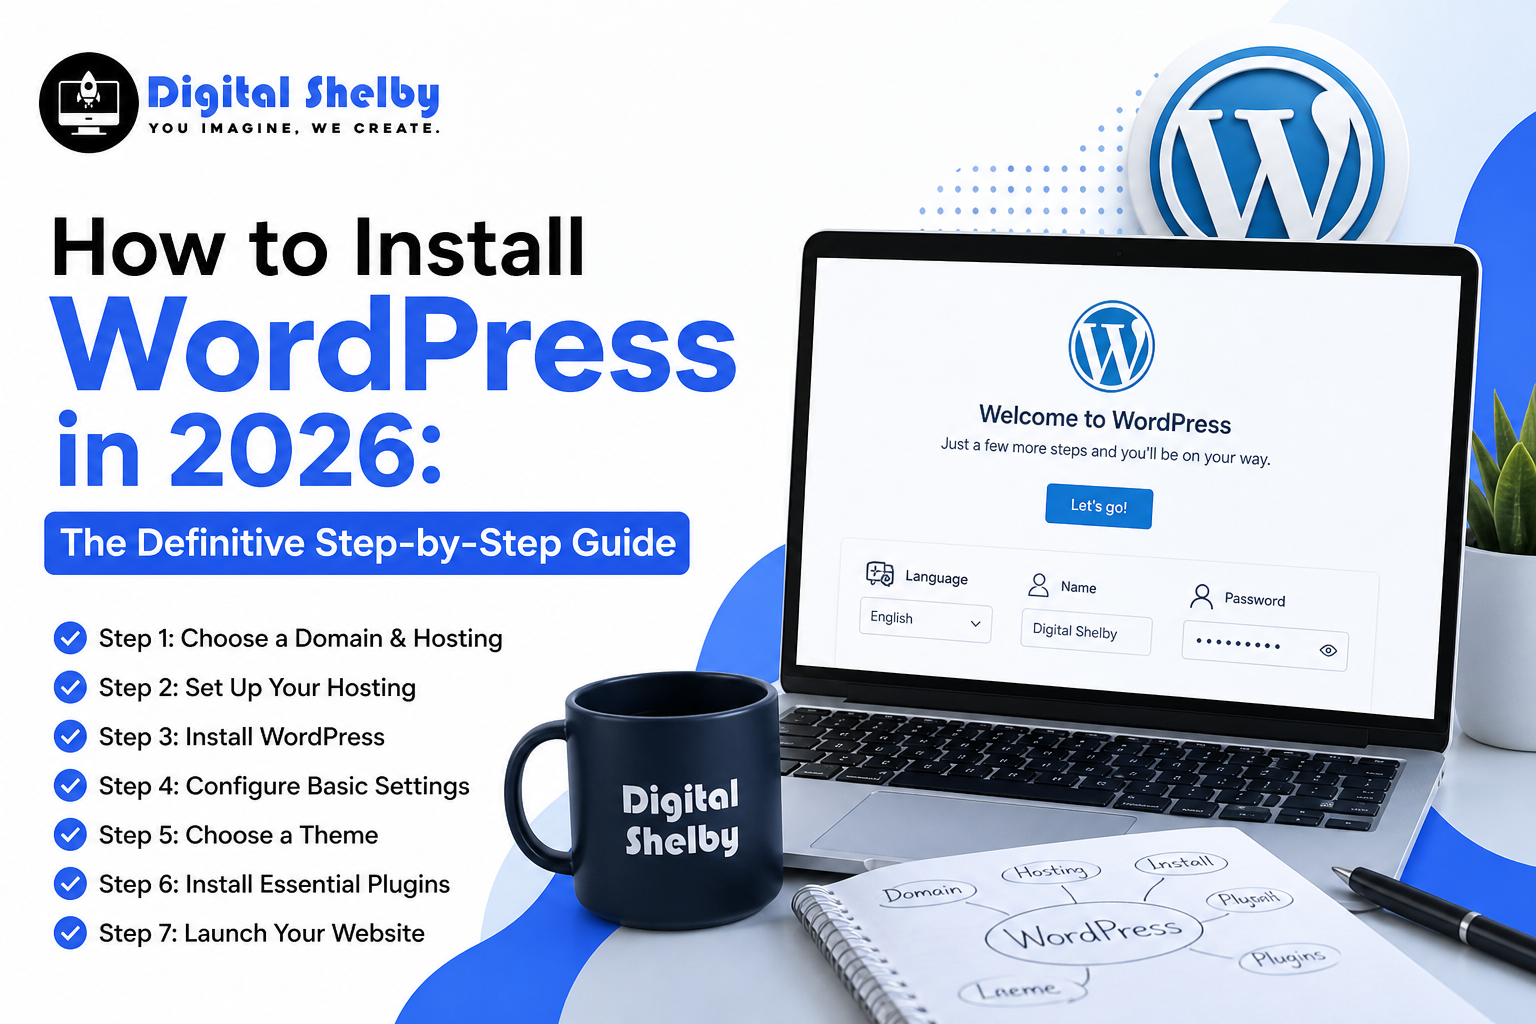
How to Install WordPress in 2026: The Definitive Step-by-Step Guide
Launching a website today requires more than just picking a basic template. You need speed, rock-solid security, and a platform that scales alongside your business growth. For the team at Digital Shelby, we know that a high-converting digital presence starts with a flawless technical foundation.
If you want to move beyond a simple hobby blog and build a professional digital storefront, you need to know exactly how to install WordPress in 2026. Consider this article your comprehensive WordPress step-by-step guide. We will walk you through the entire process, cutting out the fluff and focusing on the modern configurations that matter most for search engine visibility and user experience.
The Modern Content Management Landscape
Why does this specific platform remain the dominant force on the internet? Despite heavy marketing from closed-ecosystem website builders, self-hosted WordPress powers nearly half of the entire web. The reason comes down to ownership, flexibility, and SEO potential.
The current software iterations focus heavily on native performance optimization and Full Site Editing (FSE). You are not just renting space on someone else’s server; you own your data, your content, and your code. By mastering how to install WordPress in 2026, you bypass the limitations of generic site builders and unlock the ability to customize every single pixel of your digital brand.
Pre-Installation Checklist: Gathering Your Digital Assets
Before we jump into the exact mechanics of how to install WordPress in 2026, you must gather your necessary digital materials. Preparing these items in advance makes the actual WordPress installation 2026 process take less than five minutes from start to finish.
- A Premium Domain Name: This is your digital address (e.g., yourbrand.com). Keep it short, memorable, and relevant to your industry. Avoid using hyphens or numbers, as they look unprofessional and confuse users.
- A High-Performance Hosting Provider: Your host is the physical server where your website files live. In 2026, standard shared hosting often falls short. Look for hosts that offer NVMe SSD storage, dedicated RAM, and support for PHP 8.4 or higher to ensure maximum speed.
- An Active SSL Certificate: An SSL certificate encrypts the data passing between your website and your users. Most modern hosting providers include this for free. You must activate it before launching to secure that crucial “HTTPS” padlock in the browser bar, which serves as a direct ranking factor for search engines.
Step 1: Executing the Installation
Depending on your hosting environment, you generally have two paths to get the software running. We will cover both methods so you can choose the one that fits your technical comfort level.
Option A: The Modern One-Click Method (Highly Recommended)
Top-tier hosting providers utilize advanced control panels that handle the heavy lifting for you. This is the safest and fastest route for almost all business owners.
- Access Your Dashboard: Log in to your hosting account portal (commonly cPanel, hPanel, or a proprietary brand dashboard).
- Locate the Auto-Installer: Find the section labeled “Software,” “App Installer,” or simply click the prominent WordPress icon.
- Configure the Setup Form:
- Select Domain: Choose the specific domain where you want the site to live.
- Directory: Leave this field completely blank unless you specifically want the site to load at yourdomain.com/blog.
- Admin Username: Never use “admin” or your own name. Create a unique, unrecognizable username to thwart brute-force login attacks.
- Admin Password: Generate a complex string containing at least 15 characters, mixing uppercase, lowercase, numbers, and symbols.
- Admin Email: Input an email address you monitor daily, as this is where critical security alerts and password resets will go.
- Execute: Click the install button. The server will automatically create your database, bind the files, and provide your login URL.
Option B: The Manual Database Method
If you use a Virtual Private Server (VPS) or a host without an automated installer, you must build the environment manually.
- Download the Core Files: Navigate to the official WordPress.org repository and download the latest software package (a .zip file).
- Upload to Your Server: Use an FTP client (like FileZilla) or your host’s File Manager to upload and extract those files directly into the public_html folder.
- Create the MySQL Database: Inside your hosting panel, generate a new database. Create a new database user, assign that user a strong password, and grant them “All Privileges” to the database. Save these exact credentials in a secure document.
- Run the Configuration Script: Open your web browser and type in your domain name. The screen will prompt you to select a language and enter the database name, username, and password you just created.
- Finalize the Build: Follow the final on-screen prompts to establish your site title and administrator login details.
Step 2: Critical Post-Installation Adjustments
Once the core files sit successfully on your server, you will land on your new dashboard. Do not start writing content yet. You must properly setup WordPress site configurations to ensure search engines crawl your pages correctly.
Optimize Your Permalinks
Navigate to Settings > Permalinks on the left-hand menu. Select the “Post Name” option. This forces your URLs to look clean and readable, such as [digitalshelby.com/our-services/](https://digitalshelby.com/our-services/). If you skip this step, your URLs will default to a messy string of numbers, which severely damages your SEO potential.
Establish Site Title and Timezone
Go to Settings > General. Verify your Site Title matches your exact brand name. Add a concise tagline that includes a primary keyword describing your business. Scroll down and set your exact timezone so your scheduled blog posts publish at the correct local time.
Purge Default Placeholder Content
The software automatically generates a “Hello World” post, a sample page, and a default comment. Go to the Posts and Pages sections and delete these items permanently. Leaving placeholder content live on your site creates “thin content” errors when search bots crawl your domain.
Step 3: Integrating a Modern Block Theme
The visual architecture of the platform has shifted entirely to Block Themes. These themes utilize the Full Site Editor, allowing you to modify headers, footers, and page templates using a visual, drag-and-drop interface without touching a single line of PHP code.
When selecting a theme from the repository, prioritize speed and weight. Heavy, bloated themes will drag your loading times down and frustrate mobile users. Look for lightweight, performance-focused frameworks. Always ensure the developer tags the theme as “Accessibility Ready” and “Mobile Responsive” to guarantee a flawless experience across all devices.
Step 4: Deploying Essential Functionality Plugins
Plugins add specific features to your website. However, installing too many plugins will bloat your database and create severe security vulnerabilities. Keep your plugin stack lean and stick to these mandatory categories:
- Search Optimization: Install Rank Math or Yoast SEO. These tools help you manage meta descriptions, generate XML sitemaps, and analyze keyword density.
- Active Security: Use a firewall plugin like Wordfence to actively block malicious traffic and brute-force login attempts.
- Speed and Caching: Deploy a caching tool like LiteSpeed Cache or WP Rocket. Caching stores a static version of your site, allowing it to load in milliseconds for returning visitors.
- Automated Backups: Use UpdraftPlus to schedule daily, off-site backups to Google Drive or Dropbox. If your site ever crashes, you can restore it with one click.
Step 5: Hardening Your Digital Defenses
Cyber threats constantly adapt. Relying on a strong password simply isn’t enough to protect your business assets anymore.
- Enforce Two-Factor Authentication (2FA): Install a 2FA plugin that requires you to enter a time-sensitive code from your smartphone before accessing the dashboard.
- Limit Login Attempts: Configure your security plugin to permanently block any IP address that fails to log in after three consecutive attempts.
- Obscure the Login Portal: Hackers program bots to constantly attack the default /wp-admin URL. Use a security tool to change that URL to a custom, secret phrase that only you and your team know.
Common Questions About How to install WordPress in 2026
How much does it cost to launch?
The core software itself is entirely free and open-source. However, you must pay for your domain name (roughly $10 to $20 annually) and your server hosting (typically $10 to $50 monthly for a business-grade environment). Premium themes and pro-level plugins are optional expenses.
Can I build the site on my computer first?
Yes. You can use local development software like LocalWP to install and design the entire website directly on your hard drive. Once you finish the design, you can migrate the finished files to your live hosting server.
Is the platform friendly for total beginners?
Yes. The modern Gutenberg block editor functions highly intuitively. You add text, images, and layout elements by simply clicking and dragging blocks onto the screen, requiring zero coding knowledge.
What is the difference between the .com and .org versions?
The .com version is a hosted, restricted service where the parent company manages the technical side but limits your monetization and customization options. The .org version (which we detailed in this guide) is the self-hosted software that gives you 100% ownership and unrestricted control over your digital property.
Launching Your Digital Presence
Understanding how to install WordPress in 2026 gives you complete ownership over your digital assets. You now have a fast, secure, and highly scalable platform ready to represent your brand to the world.
Remember, launching the site is only the beginning of the journey. The real work involves publishing high-quality, keyword-optimized content that speaks directly to your target audience. Keep your plugins updated, monitor your security logs, and consistently track your site speed.
If you need advanced technical support, custom web development, or a dedicated SEO campaign to drive traffic to your newly launched pages, the digital marketing experts at Digital Shelby are ready to help you dominate your market.
Ready to take your website to the next level? Contact Digital Shelby today for expert guidance and start building a powerful, growth-driven online presence.